
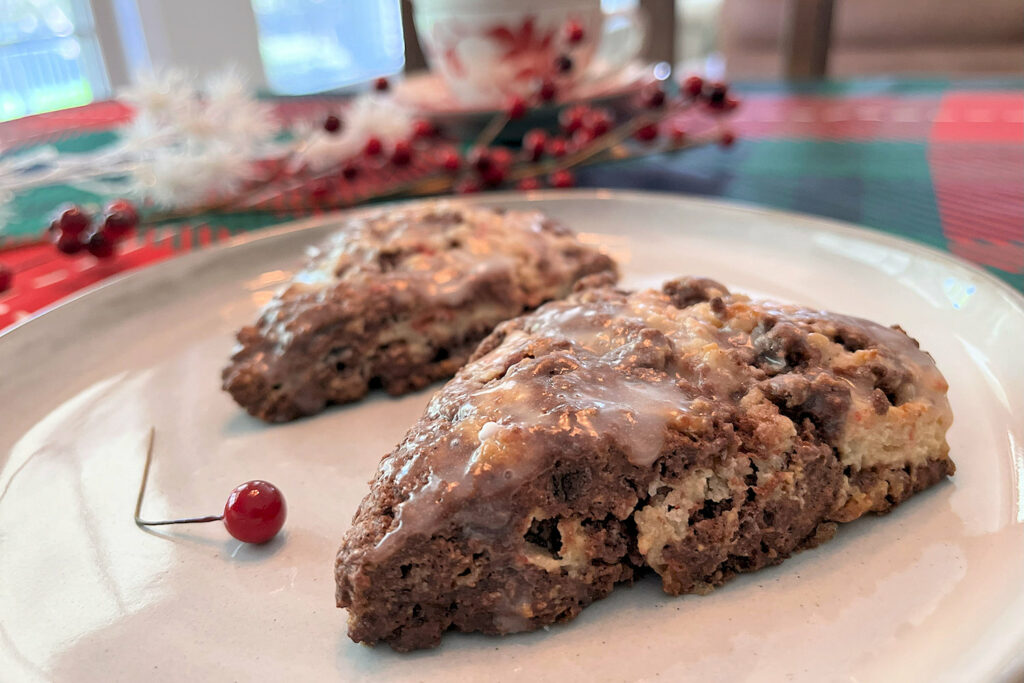
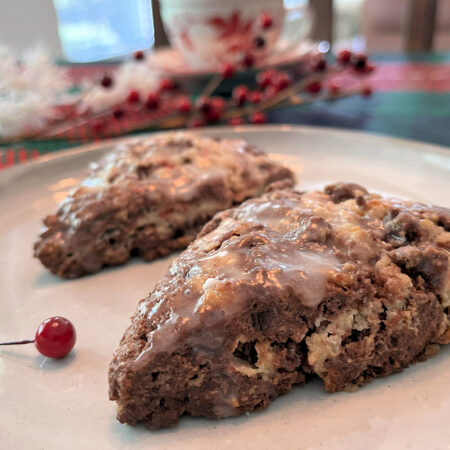
Waiting for reindeer
Candy canes aren’t just Christmas tree decorations. Crushed candy canes add a crunchy coolness to the peppermint clusters in these Christmasy scones. They compliment the rich chocolate clusters that combine two separate doughs to create an irresitable wintery marble treat.
Inspired by Alton Brown’s Chocolate Peppermint Pinwheel Cookies recipe, these scones with their light peppermint glaze bring the excitement and anticipation of the season as kids, young and old, wait for reindeer on the roof.
Step by step instructions
For this recipe you will create two separate doughs. A chocolate dough and a candy cane dough. The ingredients for each dough is slightly different. They will be combined after the separate wet ingredients have been added to each dough to create marbled brown and pink scones.
Blend the wet ingredients:
Blend the milk and egg together thoroughly using a milk frother or blender. Transfer the ingredients to two separate squeeze bottles or other containers.
Add 1/2 tsp of vanilla extract to the squeeze bottle for the chocolate dough and shake to mix.
Add 1/2 tsp of peppermint extract to the squeeze bottle for the candy cane dough and shake to mix.
Put the squeeze bottles in your refrigerator to cool until you combine the wet and dry ingredients.
Combine the dry ingredients:
Break up 2 or 3 candy canes and place them into a plastic bag. Use the bottom of pot to crush them into small pieces without pulverizing them into a powder. It’s better to crush them then to the hammer them. Set aside 1/4 cup of the crushed candy canes until combining the wet and dry ingredients.
Chocolate dough:
Add 3/4 cup flour, 3 tbsp granulated sugar, 1 1/2 tsp baking powder, and 3 tsp of cocoa powder to a large mixing bowl and stir to combine.
Slice the butter into chunks:
Slice 3 tbsp of the butter into chunks by cutting the length of a stick of butter you’re using in half along its long side, flip it on its side, and slice it again in half. Then cut the long side in half and each half into quarters. Mix the butter chunks into the chocolate dry ingredients.

Cut the butter into the chocolate dry ingredients:
Use a butter cutter to cut the butter into the chocolate dry ingredients until they are about the size of peas.

Candy cane dough:
Add 3/4 cup flour, 1 tbsp granulated sugar, and 1 1/2 tsp baking powder to a large mixing bowl and stir to combine.
Slice the butter into chunks:
Slice 2 tbsp of the butter into chunks by cutting the length of a stick of butter you’re using in half along its long side, flip it on its side, and slice it again in half. Then cut the long side in half and each half into quarters. Mix the butter chunks into the candy cane dry ingredients. See video above.
Cut the butter into the dry ingredients:
Use a clean butter cutter to cut the butter into the candy cane dry ingredients until they are about the size of a pea. See the video above.
Put both bowls in the freezer for 15 minutes. Preheat your oven to 400° and line your baking sheet with parchment paper.
Combine the wet and dry ingredients:
After 15 minutes, remove the bowl with the chocolate dry ingredients from the freezer and place it on a sticky pad. A sticky pad makes this step go faster by keeping the bowl still while stirring in the wet ingredients. You may have to rub the bottom of the bowl to remove any ice before putting it on the sticky pad.
Remove the squeeze bottle with the vanilla wet ingredients from the refrigerator. Slowly combine the wet and dry chocolate ingredients by squirting a thin line with the squeeze bottle and rapidly stirring it in with the tines of a large (serving) fork. This MUST BE DONE BY HAND. You don’t want to create a mix or dough. You want to wet the dry ingredients to keep them in pea-sized clusters.

When the dry ingredients start to look wet, use the tines to pull the moist ingredients to one side. This will expose the drier ingredients below. Use smaller squirts from the squeeze bottle onto the dry ingredients and stir faster with the tines. When no dry ingredients are left, stop adding liquid.

Remove the squeeze bottle with the peppermint wet ingredients from the refrigerator. Slowly combine the wet and dry candy cane ingredients by squirting a thin line with the squeeze bottle and rapidly stirring it in with the tines of a large (serving) fork.
When the dry ingredients start to look wet, use the tines to pull the moist ingredients to one side. This will expose the drier ingredients below. Use smaller squirts from the squeeze bottle onto the dry ingredients and stir faster with the tines. When no dry ingredients are left, stop adding liquid.
Add in the crushed candy canes:
Sprinkle half of the crushed candy canes on top of the candy cane dough and mix thoroughly with the tines of the large fork. Sprinkle the remaining half of the candy canes and again mix thoroughly with the tines of the large fork.
Form the dough:
Add the candy cane mixture to the chocolate mixture and lightly stir. Mix them just enough that both colors are scattered throughout with the different colors staying separate.

Start to form the dough. Gently press it down and fold it a few times until it forms one log. Fold the log in half and move it to a silicone mat.

It’s easiest to form the dough using a 7” ring. Press the dough from the center outward until the dough fills the ring. Swirl the ring around the dough to give it a better edge. Then remove the ring. If forming by hand, press the flat side of your long knife around the edges to firm them.

Cut the dough into eight scones:
Make four equal cuts with a long serrated knife to divide the dough into eight sections. Move the knife slightly back and forth on its flat side with each cut to make it easier to separate each scone.

Place the scones on your baking sheet:
Slide the flat side of the long knife under each scone and move it to the parchment paper on the baking sheet.
TIP: If you plan to store or serve the scones on a 10” cake round after they’re baked, make sure to place them on the parchment paper in the same order that you take them off of the dough circle. Otherwise, they will not form an even circle.

Bake:
Place your baking sheet on a middle rack in your preheated oven and bake for eight minutes at 400°.
When eight minutes is up, turn the pan around in the oven and bake for another seven to eight minutes. The center of the scones should feel solid, not liquidy.
Mix the powdered sugar, peppermint extract, and milk together. Add enough milk milk to make a thin glaze.
Remove the scones to a cooling rack.
TIP: If you plan to store or serve the scones on a 10” round after they’re baked, make sure to keep them in the same order that you took them off of the original dough circle. Otherwise, they will not form an even circle.
Glaze the scones:
As soon as the scones come out of the over, dab or brush the glaze on top of each scone with a silicone brush. The glaze should give a light shine to the top of the scones without hiding the brown and pink marbling.
Chocolate Candy Cane Scones
Equipment
Ingredients
Wet Ingredients
- ½ cup Whole milk*
- 1 Egg, large
- ½ tsp Vanilla extract added to chocolate half.
- ½ tsp Peppermint extract added to candy cane half.
Dry Ingredients
- 1 ½ cups All purpose flour divided
- 4 tbsp granulated suger divided
- 3 tsp Baking powder divided
- 3 tsp Cocoa poweder added to chocolate half.
- ¼ cup Crushed candy canes added to candy cane half
- 5 tbsps Butter*** divided
Icing Ingredients
- ½ cup Powdered sugar
- ½ tsp Peppermint extract
- 2 tbsp Milk more to consistency
Instructions
Wet Ingredients
- Blend the milk and egg with a milk frother or blender.
- Divide the mixture in half into two separate squeeze bottles or other containers.
- Add 1/2 tsp of vanilla extract to the mixture for the chocolate dough and shake to mix.
- Add 1/2 tsp of peppermint extract to the mixture for the candy cane dough and shake to mix.
- Place the wet ingredients in your refrigerator until ready to combine the wet and dry ingredients.
Dry Ingredients
- Break up 2 or 3 candy canes and put them in a plastic bag. Use a hammer or the bottom of a pot to crush them into small pieces. Do not pulverize them into a powder.
- Set aside 1/4 cup of the crushed candy canes to be added later.
Chocolate dough
- Mix 3/4 cup of flour, 3 tbsp of granulated sugar, 1 1/2 tsp of baking powder, and 3 tsp of cocoa powder in a large mixing bowl.
- Slice 3 tbsp of the butter into chunks and mix with the chocolate dry ingredients.
- Cut the butter into the chocolate dry ingredients with a butter cutter until the butter is the size of peas.
- Put the bowl with the chocolate dry ingredients in your freezer.
Candy cane dough
- Mix 3/4 cup of flour, 1 tbsp of granulated sugar, and 1 1/2 tsp of baking powder in a large mixing bowl.
- Slice 2 tbsp of the butter into chunks and mix with the candy cane dry ingredients.
- Cut the butter into the candy cane dry ingredients with a butter cutter until the butter is the size of peas.
- Put the bowl with the candy cane dry ingredients in your freezer for 15 minutes. The crushed candy canes will be added later.
- Preheat your oven to 400°.
- Line your baking sheet with parchment paper.
Combine the Wet and Dry Ingredients
- Using the "tine method" (see video in step by step instructions above), separately combine the wet ingredients into the dry ingredients for the chocolate dough and the candy cane dough until the ingredients are wet but still a little larger than pea sized.
- After you have added the wet ingredients to the candy cane dry ingredient, add half of the crushed candy canes to that dough and thoroughly mx.
- Add the other half of the crushed candy canes to that dough and thoroughly mix.
Form the Scones
- Add the candy cane mixture to the chocolate mixture and stir just enough to mix them with the different colors separate.
- Gently flip and press the ingredients in the bowl until they form one log.
- Fold the log in half and move it to a silicone mat.
- Using the guide of the measured circles on a silicone mat or a 7" ring, form the dough into a 7" circle by gently pressing from the center of the dough to the edges.
- If using a 7" ring, swirl the ring around the dough a few times to firm the edges. If forming by hand, press the edges of the dough lightly with the flat side of a long knife to firm the edges.
- Use a long serrated knife to make four equal cuts through the center of the dough to divide the dough into eight scones.
- Slide the flat edge of the long knife under each scone and move it to the parchment paper on the baking sheet, leaving about 1" between each scone.
Bake the Scones
- Place your baking sheet on a middle rack in your oven at 400° and bake for 8 minutes.
- After 7 minutes make sure the centers of the scones feel firm, not liquidy. If not, bake for another 1 or 2 minutes.
- Mix the powdered sugar, peppermint extract, and milk for the glaze until it is thin.
- Remove the baking sheet from the oven and move the scones to a cooling rack with the flat edge of a long knife or a spatula.
Glaze the Scones
- While the scones are still hot, dab or brush the glaze on top of each scone with a silicone brush.
Storage
- Cover any scones that will not be eaten right away. They will last about 5 days without refrigeration, about 7 days in your refrigerator, and about 3 months in your freezer.
- Let the scones cool completely before covering them with plastic wrap,
- To thaw frozen scones, let them come to room temperature (about 30 minutes) or microwave for 10 seconds.