
The Battenberg
The Battenberg Cake was created in 1884 for the wedding of Queen Victoria’s granddaughter to Lord Battenberg. It became Queen Victoria’s favorite and a high tea stable throughout the UK and Ireland.
A traditional Battenberg has four checkerboard squares of alternating white and pink with apricot preserves between each square and  around the cake which is surrounded by almond marzipan. On first bite, it presents a delightful fusion of sweet, complex flavors that is unforgettable.
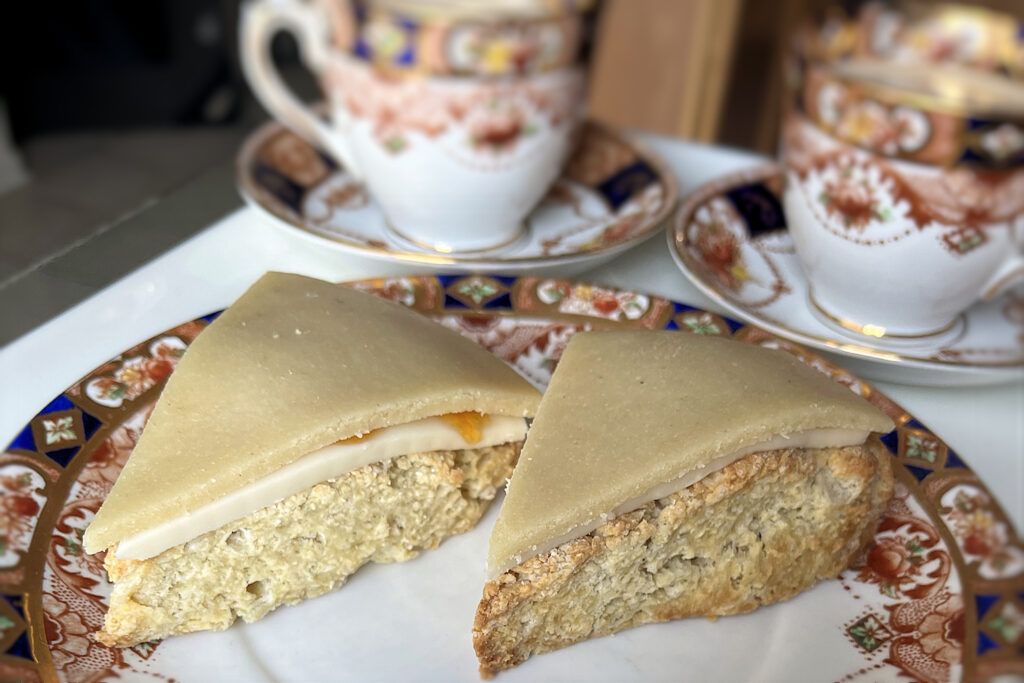
The Battenberg Scone is a subtle cherry flavored scone topped with thin layers of vanilla buttercream, apricot preserves, and almond marzipan. More substantial and crunchier than a Battenberg Cake, those familiar with the cake assure me these scones capture their flavor.
Battenberg scones take a little more time and preparation. Save them for a special treat, like welcoming the new spring. The scone itself is easy to make. The detailed instructions for the buttercream and marzipan toppings seem long, but they only take about 10 minutes each and can, and should, be made the day before.
When making this recipe, I assumed it would be more palatable to adults than children. I was pleasantly surprised to find out that it is my 7-year-old grandson’s second favorite scone that I make.
Step by step instructions
Prepare the buttercream layer:
At least 2 hours before you start making the scones, and preferably the night before, prepare the buttercream layer. It needs to be refrigerated long enough to become stiff.
Leave the butter out at room temperature for it to soften, but not melt. You can use Crisco shortening instead of butter if you prefer not to refrigerate the scones when they’re done.
Sift the powdered sugar into the bowl of a stand mixer or a medium sized bowl if you’re using a hand mixer. Add the butter and almond extract and beat them with a flat blade for a stand mixer, or regular blades of a hand mixer, on low until the mixture forms into beads. Then continue to mix on high until it forms a ball.
Place the ball on a piece of parchment paper or wax paper at least 10″ square on a flat surface. Flaten the ball with your hand, spreading it into as large of a circle as you can. Cover the buttercream with plastic wrap that as large as the piece of parchment or wax paper.
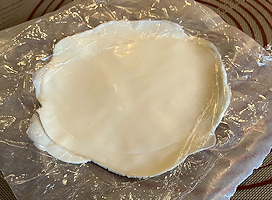 Use a rolling pin to roll out the buttercream as thin as you can into a circle. It must be at least 8″ and preferably 10″. Leave the plastic wrap on the top of the buttercream and the parchment or wax paper on the bottom and save it in your refrigerator without bending.
Prepare the marzipan layer:
At least 2 hours before you start making the scones, and preferably the night before, prepare the buttercream layer. It needs to be refrigerated long enough to become stiff.
Place the almond flour and powdered sugar in your food processor with a multi-purpose “S” blade. Pulse the ingredients a few times to combine them. Then process on high for 1-2 minutes. This refines the dry ingredients so that the marzipan will be smooth and pliable.
Combine the water and extract in a cup and mix. You will add small amounts of the water/extract through the funnel of your food processor as you pulse the ingredients. Just press and release the pulse button and pour about 1/4 of the liquid in as the blades are turning. It will take about 4 pules to add the liquid. Pulse the marzipan a few more times until it come together in a loose ball.
Use the same procedure for rolling out the marzipan between parchment or wax paper and plastic wrap into an 8″ to 10″ circle as you did for the buttercream layer. When, done, place it on top of the buttercream in your refrigerator.
Prepare the apricot preserve layer:
Just before you start making the scones, add the apricot preserves and water to a small pan. Cook on medium heat for 15-20 minutes. After 5 minutes it should start to bubble, but make sure it does not burn.
Stir the preserves occasionally while making the scones and break up any clumps of fruit with a fork. When it reaches a thick, smooth consistency that does not quickly drip for a spoon, take it off the burner and let it cool.
Blend the wet ingredients:
Blend the milk, cherry extract, and egg together thoroughly using a milk frother or blender. Transfer the ingredients to a squeeze bottle and put it in your refrigerator to cool until you combine the wet and dry ingredients.
TIP: If you’re making a second batch to cook or freeze, blend the wet ingredients for both batches and place them in separate squeeze bottles.
Combine the dry ingredients:
Add all of the dry ingredients, flour, granulated sugar, baking powder, baking soda, and salt, to a large mixing bowl and stir to combine.
Slice the butter into chunks:
Slice the butter into chunks by cutting the length of a stick of butter you’re using in half along its long side, flip it on its side, and slice it again in half. Then cut the long side in half and each half into quarters. Mix the butter chunks into the dry ingredients.

Cut the butter into the dry ingredients:
Use a butter cutter to cut the butter into the dry ingredients until they are about the size of peas.

Put the dry ingredients in your freezer for 15 minutes and preheat the oven to 400°. Line a baking sheet with parchment paper.
Combine the wet and dry ingredients:
After 15 minutes, remove the bowl with the dry ingredients from the freezer and place it on a sticky pad. A sticky pad makes this step go faster by keeping the bowl still while stirring in the wet ingredients. You may have to rub the bottom of the bowl to remove any ice before putting it on the sticky pad.
Remove the squeeze bottle with the wet ingredients from the refrigerator. Slowly combine the wet and dry ingredients by squirting a thin line with the squeeze bottle and rapidly stirring it in with the tines of a large (serving) fork. This MUST BE DONE BY HAND. You don’t want to create a mix or dough. You want to wet the dry ingredients to keep them in pea-sized clusters.

When the dry ingredients start to look wet, use the tines to pull the moist ingredients to one side. This will expose the drier ingredients below. Use smaller squirts from the squeeze bottle onto the dry ingredients and stir faster with the tines. When no dry ingredients are left, stop adding liquid.

Form the dough:
Start to form the dough. Gently press it down and fold it a few times until it forms one log. Fold the log in half and move it to a silicone mat.

It’s easiest to form the dough using a 7” cake ring. Press the dough from the center outward until the dough fills the ring. Swirl the ring around the dough to give it a better edge. Then remove the ring.
If forming by hand, press the flat side of your long knife around the edge to firm it.

Cut the dough into eight scones:
Make four equal cuts with a long serrated knife to divide the dough into eight sections. Move the knife slightly back and forth on its flat side with each cut to make it easier to separate each scone.

Place the scones on your baking sheet:
Slide the flat side of the long knife under each scone and move it to the parchment paper on the baking sheet.

Bake:
Place your baking sheet on a middle rack in your preheated oven and bake for 14 to 16 minutes at 400°.
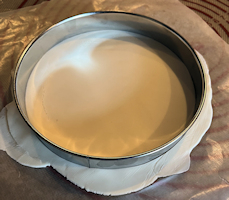 As soon as you place the scones in the oven, remove the buttercream layer from your refrigerator. Remove, but save the plastic wrap cover. Using an 8-inch ring, an 8-inch-cake round, or the measured circle on your silicone mat, cut an 8″ circle in the middle of the buttercream.
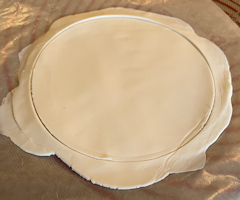
Make 4 equal cuts across the buttercream circle by pushing down with your long serrated knife to divide the buttercream into 8 sections. 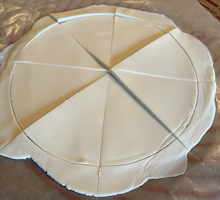 Cover the buttercream with the plastic wrap and put it back in the refrigerator until after the scones are finished.
Halfway through, check to see if one side is cooking faster than the other and, if so, turn the pan around in the oven and continue to bake. Remove the scones to a cooling rack when the center of the scones feel solid, not liquidy.
Put the toppings on the scones:
Wait about 5 minutes after the scones have come out of the over to top them with the 3 layers. You want the scones a little warm so that the first layer, the buttercream, conforms to the scone without melting.
Slide your long serrated knife under a section of the buttercream and place it on top a scone. It may be slightly larger than the top of the scone, that’s okay. Do this for all 8 sections and scones. Then lightly press the edges of the buttercream with the flat edge of the knife.
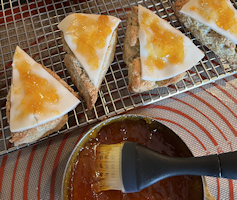 Use a spoon to put some of the apricot preserves on top of the buttercream layer on each scone. Spread it with a silicone brush or the spoon to a 1/4″ of the edges. It will spread when you add the marzipan layer.
Slide your long serrated knife under each section of the marzipan and place it on top each scone. Then lightly press the edges of the marzipan with flat edge of the knife.
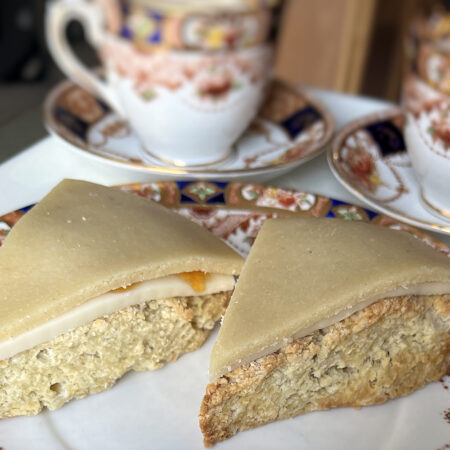
Battenberg Scones
Equipment
- 8-inch metal ring for toppings
- Rolling Pin
- Food processor
Ingredients
Vanilla Buttercream Layer
- 3 tbsp Butter or Crisco
- 1 cup Powdered sugar
- ½ tsp Almond extract
Almond Marzipan Layer
- ¾ cup Almond flour
- ½ cup Powdered sugar
- ½ tsp Almond extract
- 1 ¾ tbsp Water
Apricot Preserve Layer
- ⅓ cup Apricot preserves
Wet Ingredients
- ½ cup Whole milk*
- 1 tsp Cherry extract Can substitute cherry juice from canned or bottled cherries.
- 1 Egg, large
Dry Ingredients
- 1 ½ cups All purpose flour
- ¼ cup Granulated sugar**
- 2 ¾ tsps Baking powder
- ¼ tsp Baking soda
- ⅜ tsp fine sea salt 1/4 + 1/8 tsps
- 4 tbsps butter***
Instructions
Vanilla Buttercream Layer
- This should be prepared at least two hours before you start making the scones or the night before.
- Leave the butter out at room temperature to soften, but not melt. You can use Crisco instead of butter if you prefer not to refrigerate the scones when they're done.
- Sift the powdered sugar into the bowl of a stand mixer or a medium sized bowl if you're using a hand mixer.
- Add the butter and almond extract and mix with a flat blade until the mixture forms into beads. Then continue to mix on high until it forms a ball.
- Place the ball on a piece of parchment or wax paper at least 10" square.
- Flaten the ball with your hand spreading it into as large of a circle as you can.
- Plance another piece of parchment or wax paper at least 10" square on top of the buttercream.
- Roll out the buttercream as thin as you can in a circle. It must be at least 8" and preferably 10".
- Leave the parchment or wax paper on the top and bottom of the buttercream and save it in your refrigerator without bending it.
Almond Marzipan Layer
- This too should be prepared at least two hours before you start making the scones or the night before.
- Place the almond flour and powdered sugar in your food processor with a multi-purpose "S" blade. Pulse the ingredients a few times to combine them. Then process on high for 1 minute.
- Combine the water and extract in a cup.
- Add small amounts of the water/extract from the funnel of your food processor as you pulse the ingredients. Continue to pulse the ingredients until they come together in a loose ball.
- Place the ball on a piece of parchment or wax paper at least 10" square.
- Flaten the ball with your hand spreading it into as large of a circle as you can. Make sure there are on holes in the circle.
- Plance another piece of parchment or wax paper at least 10" square on top of the Marzipan.
- Roll out the marzipan as thin as you can in a circle. It must be at least 8" and preferably 10".
- Leave the parchment or wax paper on the top and bottom of the Marxipan and save it in your refrigerator without bending it. You can place it on top of the buttercream layer in the refrigerator.
Apricot Preserve Layer
- Just before you start to make the scones, put the apricot preserves and water in a small pan and cook on medium heat. It should bubble but not burn as it cooks.
- Break up any clumps of fruit with a fork as it cooks and ocassionally stir the mixture while making the scones.
- Take it off the burner to cool when it is a smooth, thick consistency that does not quickly drip from a spoon.
Wet Ingredients
- Blend the milk, cherry extract, and egg with a milk frother or blender.
- Transfer to a squeeze bottle and place in your refrigerator.
Dry Ingredients
- Mix the flour, granulated sugar, baking powder, baking soda, and salt in a large mixing bowl.
- Slice the butter into chunks and mix with the dry ingredients.
- Cut the butter into the dry ingredients with a butter cutter until the butter is the size of peas.
- Put the bowl with the dry ingredients in your freezer for 15 minutes.
- Preheat your oven to 400°.
- Line your baking sheet with parchment paper.
Combine the Wet and Dry Ingredients
- Using the "tine method" (see video in step by step instructions above), combine the wet ingredients into the dry ingredients until the ingredients are wet but still pea sized.
Form the Scones
- Gently flip and press the ingredients in the bowl until they form one log.
- Fold the log in half and move it to a silicone mat.
- Using the guide of the measured circles on a silicone mat or a 7" ring, form the dough into a 7" circle by gently pressing from the center of the dough to the edges.
- If using a 7" ring, swirl the ring around the dough a few times to firm the edges. If forming by hand, press the edges of the dough lightly with the flat side of a long knife to firm the edges.
- Use a long serrated knife to make four equal cuts through the center of the dough to divide the dough into eight scones.
- Slide the flat edge of the long knife under each scone and move it to the parchment paper on the baking sheet, leaving about 1" between each scone.
Bake the Scones
- Place your baking sheet on a middle rack in your preheated oven and bake for 14 to 16 minutes at 400°.
- While the scones are baking, one at a time take out the sheets of buttercream and marzipan. If you have an 8" ring, cut the layers using the ring, if not, cut them into 8" rings with the measured circles on a silicone mat. Then use a long serrated knife to divide each layer into 8 sections. Cover them again and place the layers back in the refrigerator.
- Halfway through,check to see if one side is cooking faster than the other and, if so,turn the pan around in the oven and continue to bake. Remove the scones to a cooling rack when the center of the scones feel solid, not liquidy.
Topping the Scones
- Wait about 5 minutes after the scones have come out of the over to top them with the 3 layers. You want the scones a little warm so that the buttercream layer forms onto the scone without melting.
- Slide your long serrated knife under a section of the buttercream and place it on top a scone. It may be slightly larger than the top of the scone, that's okay. Do this for all 8 sections and scones. Then lightly press the edges of the buttercream with flat edge of the knife.
- Use a spoon to put some of the apricot preserves on top of the buttercream layer on each scone. Spread it with a silicone brush or the spoon to a 1/4" of the edges. It will spread when you add the marzipan layer.
- Slide your long serrated knife under each section of the marzipan and place it on top each scone. Then lightly press the edges of the marzipan with flat edge of the knife.
Storage
- Cover any scones that will not be eaten right away. If you used butter, they should be stored in the refrigerator and will last about 5 days. If you used Crisco, they will last without refrigeration for about t das.. The will last for about 3 months in your freezer.
- Let the scones cool completely cool before covering them with plastic wrap,
- To thaw frozen scones, let them come to room temperature (about 30 minutes). These scones should not be microwaved.